Making your own suppositories at home can be a natural approach to wellness. Many people choose this method to deliver herbs, oils, and other beneficial ingredients directly where they’re needed. This guide will walk you through the process step by step.
Understanding Homemade Suppositories
Suppositories are small, solid medications designed to melt at body temperature. They deliver ingredients through rectal or vaginal absorption. This method bypasses the digestive system entirely. Therefore, it can be more effective for certain conditions.
Natural wellness enthusiasts often prefer homemade versions. These allow complete control over ingredients. Additionally, you can customize them for specific health needs.
Benefits of DIY Suppositories
Creating your own suppositories offers several advantages. First, you know exactly what goes into them. There are no hidden chemicals or preservatives. Furthermore, homemade versions cost less than commercial products.
Another benefit is customization. You can adjust the strength and ingredients. This flexibility helps address individual wellness goals. Moreover, the process itself is surprisingly simple once you understand the basics.
Essential Ingredients and Materials
The foundation of any suppository is a base ingredient. Cocoa butter is the most popular choice. It melts at body temperature and solidifies at room temperature. Coconut oil works well too, though it has a lower melting point.
You’ll also need active ingredients. Common options include herbal extracts, essential oils, or probiotics. However, always research proper dosages before adding these ingredients.
For materials, you’ll need suppository molds. These come in various sizes and shapes. Silicone ice cube trays can work as an alternative. Additionally, gather a double boiler, measuring spoons, and stirring utensils.
Step-by-Step Preparation Process
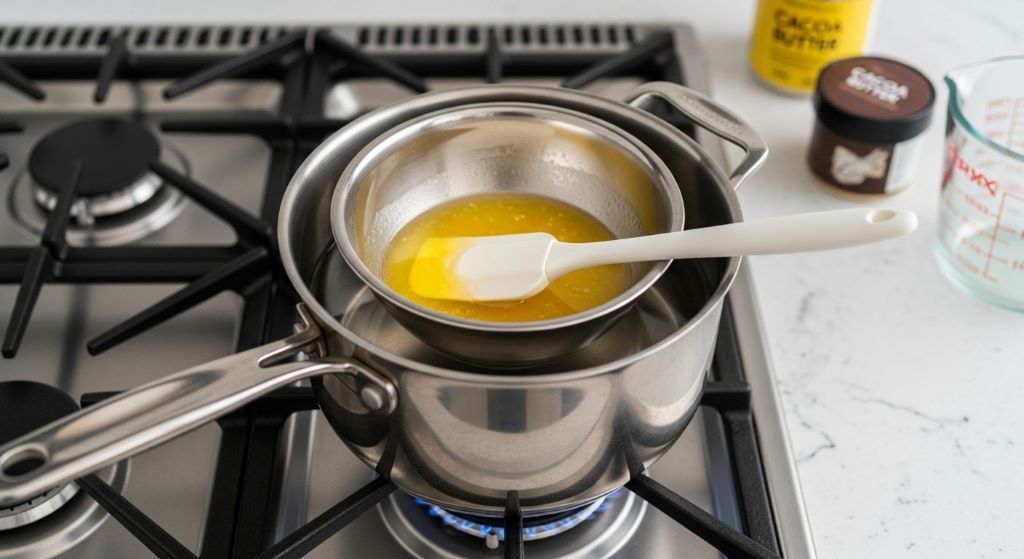
Melting Your Base
Start by setting up a double boiler. Fill the bottom pot with water and bring it to a simmer. Place your base ingredient in the top pot. Cocoa butter typically takes 10 to 15 minutes to melt completely.
Stir occasionally for even melting. The mixture should become smooth and liquid. Therefore, patience is important during this step.
Adding Active Ingredients
Once your base melts, remove it from heat. Let it cool slightly for about two minutes. This prevents degrading heat-sensitive ingredients. Then, add your chosen active ingredients slowly.
Stir thoroughly to ensure even distribution. Essential oils should be added last because heat affects their potency. Additionally, work quickly as the mixture starts cooling immediately.
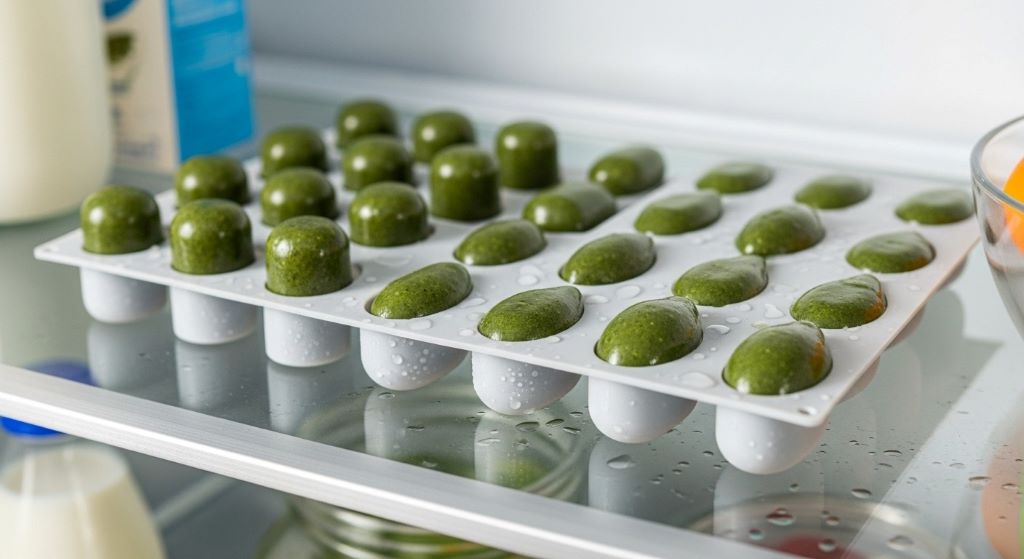
Pouring and Molding
Pour the mixture into your molds carefully. Fill each cavity to the top. However, avoid overfilling to maintain proper sizing.
Place the filled molds in the refrigerator. They typically solidify within 30 to 60 minutes. Meanwhile, clean your utensils while the mixture is still warm.
Popular Natural Ingredient Options
Herbal Additions
Calendula has soothing properties for irritated tissues. Chamomile offers calming and anti-inflammatory benefits. Witch hazel extract can help with hemorrhoid discomfort. These herbs have been used traditionally for various wellness purposes.
Essential Oils
Tea tree oil has natural antimicrobial properties. Lavender provides calming effects and supports healing. Peppermint can offer cooling relief. Nevertheless, always dilute essential oils properly. They’re extremely concentrated and can cause irritation when used undiluted.
Probiotic Options
Probiotics support healthy bacterial balance. This is especially useful for vaginal suppositories. Choose high-quality probiotic strains specifically. Furthermore, keep them refrigerated to maintain potency.
Safety Considerations and Precautions
Safety should always come first. Start with small batches when trying new recipes. This minimizes waste if something doesn’t work properly.
Test a small amount on your skin before use. This checks for allergic reactions or sensitivities. Additionally, consult healthcare providers before using suppositories for medical conditions.
Proper hygiene is crucial during preparation. Wash all utensils and molds thoroughly. Use clean hands or gloves when handling ingredients. Moreover, store finished products properly to prevent contamination.
Storage and Shelf Life
Store your suppositories in a cool, dry place. The refrigerator works perfectly for most recipes. They can last several months when stored correctly. However, products with fresh ingredients expire faster.
Label each batch with the date and ingredients. This helps track freshness and identify contents later. Additionally, keep them in airtight containers to prevent moisture absorption.
Proper Usage Guidelines
Wash your hands thoroughly before handling suppositories. Lie on your side with your lower leg straight. Bend your upper leg slightly for easier insertion.
Insert the suppository gently but firmly. Push it past the sphincter muscle for rectal use. For vaginal use, insert as far as comfortably possible. Therefore, proper technique ensures effectiveness.
Remain lying down for 15 to 20 minutes afterward. This prevents the suppository from sliding out before melting. Additionally, use a panty liner if needed for any leakage.
Common Mistakes to Avoid
Many beginners overheat their base ingredients. This can destroy beneficial properties and alter consistency. Keep temperatures low and monitor carefully. Furthermore, rushing the cooling process affects final quality.
Another mistake is using too much essential oil. More isn’t always better with concentrated ingredients. Follow recommended dilution ratios carefully. Otherwise, you risk irritation or adverse reactions.
Inconsistent stirring creates uneven distribution of active ingredients. Some suppositories end up too strong while others are too weak. Therefore, mix thoroughly for uniform results.
Troubleshooting Tips
If your suppositories are too soft, they contain too much oil. Add more cocoa butter to firm them up. Conversely, overly hard suppositories need more coconut oil for better melting.
Crumbling indicates the mixture cooled too quickly. Next time, let it cool more gradually at room temperature first. Then transfer to the refrigerator for final hardening.
Uneven texture suggests inadequate stirring. Always mix ingredients completely before pouring. Additionally, stir gently while pouring to maintain even distribution.
Cost-Effective Wellness Solution
Making suppositories at home saves money over time. Commercial products often cost significantly more. Moreover, you can make larger batches for better value.
Quality ingredients require initial investment. However, they last for many batches. Therefore, the per-unit cost drops considerably. Additionally, bulk purchasing reduces expenses further.
Conclusion
Creating homemade suppositories empowers you to take control of your natural wellness routine. This simple process requires only basic materials and ingredients. With proper technique and safety precautions, you can make effective, customized products at home.
Remember to start slowly and research ingredients thoroughly. Always prioritize safety and cleanliness throughout the process. Additionally, consult healthcare professionals when addressing specific health concerns. According to Healthline’s guide on natural remedies, understanding proper preparation methods is essential for safe home wellness practices.
The benefits of DIY suppositories include cost savings, ingredient control, and customization options. Whether you’re seeking gentle relief or preventive wellness support, homemade suppositories offer a natural alternative worth exploring.
Frequently Asked Questions
How long do homemade suppositories last?
When stored properly in the refrigerator, homemade suppositories typically last two to three months. Products made with only cocoa butter and stable ingredients last longer. However, those containing fresh herbs or probiotics expire within four to six weeks. Always label batches with creation dates and inspect for changes in color, smell, or texture before use.
Can I use any type of coconut oil?
Refined coconut oil works best for suppositories because it’s odorless and has a neutral taste. Unrefined or virgin coconut oil contains more beneficial properties but has a stronger scent. Both types function similarly as base ingredients. However, ensure the oil is food-grade quality regardless of which type you choose.
Are homemade suppositories safe for children?
Children have different physiological needs and sensitivities than adults. Always consult a pediatrician before using any suppositories on children. If approved, reduce active ingredient concentrations significantly. Additionally, use smaller molds designed specifically for pediatric use. Never assume adult dosages are appropriate for children.
What’s the ideal size for suppositories?
Standard adult rectal suppositories weigh approximately two grams and measure about one inch long. Vaginal suppositories are typically slightly larger at three to five grams. Mold size determines final dimensions. However, comfort matters most, so adjust sizes based on personal preference and intended use.
Can I add multiple herbs or oils together?
Yes, you can combine ingredients for enhanced benefits. However, research potential interactions between ingredients first. Some combinations work synergistically while others may conflict. Start with two to three ingredients maximum when beginning. Additionally, keep detailed notes about combinations that work well for future reference.
Related Topics:
Understanding Heart Health: What Every Man Should Know About Cardiovascular Risks
Why More People Are Choosing Hemp-Derived CBD for Wellness